



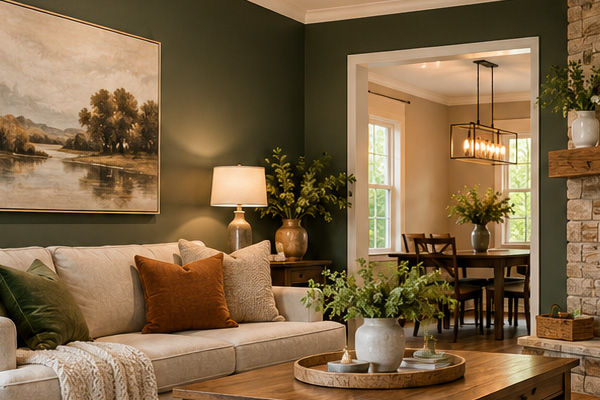
How the Right Paint and Colours Can Update Your Home, Add Value and Make Fall & Winter Your Perfect DIY Season
Few home improvement projects deliver as much visual impact for the investment as a fresh coat of paint. Paint can brighten a tired room, make a small space feel larger, modernize dated finishes and help create a more cohesive look throughout your home. For a DIY homeowner, it is also one of the most approachable upgrades - provided you spend as much time thinking about preparation and technique as you do choosing the colour.
From a professional painter's standpoint, the difference between a job that looks 'DIY' and one that looks professionally finished usually comes down to four things: choosing the right product and colour, preparing the surface properly, using good tools and applying the paint with patience.
Why Paint Is Such an Effective Home Upgrade
Colour has an immediate effect on how a room feels. Warm neutrals can make a living area feel comfortable and inviting. Soft whites can make trim and architectural details feel crisp and clean. Earthy greens, muted blues and natural tones can bring depth and personality without overwhelming a space.
Paint also helps buyers and homeowners see the home rather than the wear and tear. Scuffed walls, dated colour schemes, patched areas and discoloured trim can make an otherwise well-maintained home feel older than it is. A clean, coordinated paint palette can create a sense that the property has been cared for.
If resale is part of your thinking, resist the temptation to make every room highly personal. A broadly appealing neutral foundation lets flooring, cabinetry, furniture and architectural features do more of the work. You can still introduce personality through an accent wall, powder room, office or other contained space.
Fall and Winter: An Ideal Interior Painting Season
Spring and summer tend to get the attention for home improvement, but fall and winter are excellent times to tackle interior painting. We naturally spend more time indoors, making it a practical season to refresh the rooms we use every day.
Modern interior paints are designed to perform well in normal indoor conditions. During colder months, heating systems can also help maintain relatively consistent indoor temperatures. The key is ventilation: even with low-VOC products, provide fresh-air exchange when practical and follow the paint manufacturer's temperature, humidity, drying and ventilation instructions.
There is another advantage: completing interior projects during the colder months means your spring and summer weekends remain available for decks, landscaping, gardens and other outdoor work.
Before You Buy: Choose Colour and Sheen Carefully
Never choose a wall colour from a tiny chip alone. Light changes colour dramatically. A shade that looks warm in the store may appear cooler beside your flooring, cabinets or furniture. Test a sample on the wall or on a large movable sample board and look at it in morning light, afternoon light and under your evening lighting.
Sheen matters too. Flat and matte finishes are forgiving and help disguise minor wall imperfections, while eggshell and satin finishes generally provide greater washability. Higher-sheen products are commonly used where durability and cleaning matter, including trim and doors. Kitchens, bathrooms and high-traffic spaces deserve products formulated for the conditions they face.
The Professional Secret: Preparation
Professional painters know that the final coat cannot hide poor preparation. Before opening the paint can, remove or protect furniture, cover floors, remove switch and receptacle plates, and inspect the walls under good lighting.
• Wash away dirt, grease, dust and other contaminants, especially in kitchens and high-touch areas.
• Fill nail holes, dents and minor damage with the appropriate patching compound.
• Allow repairs to dry fully, then sand them smooth and remove sanding dust.
• Repair failed caulking around trim where appropriate.
• Spot-prime repaired areas, stains or bare surfaces as required.
• Use a suitable primer when changing dramatically from dark to light, painting a difficult substrate, covering stains, or when the paint manufacturer recommends one.
• Use painter's tape where it helps you work cleanly, but do not treat tape as a substitute for careful cutting-in.
Tools Worth Having
Good tools make the work easier and the finish better. For most rooms, plan on a quality angled brush for cutting in, a roller frame and appropriate roller cover, extension pole, paint tray or bucket and grid, drop cloths, painter's tape, filling knife, sanding materials, caulking tools where needed, clean rags and adequate task lighting. A stable step ladder is far safer than improvising with furniture.
Application: Work Like a Painter
Start by reading the label. Stir the paint thoroughly and follow the manufacturer's instructions for application, recoat time and cleanup. Cut in manageable sections around ceilings, corners, trim and openings, then roll the adjacent wall while the edge is still workable. This helps maintain a consistent appearance.
Load the roller evenly rather than saturating it. Apply the paint in sections, spread it uniformly and finish with consistent roller strokes. Do not keep working paint after it has started to set; overworking can create texture, flashing and visible marks.
Two properly applied coats are often preferable to trying to make one heavy coat do the job. Respect the recommended recoat time. Paint that feels dry to the touch may not be ready for another coat or for aggressive handling.
Cleanup and the Final Finish
Remove painter's tape according to the manufacturer's guidance; depending on the tape and coating, that may be while the paint is still slightly workable or after it has dried. Clean brushes, rollers and tools using the method specified for the coating. Do not pour leftover paint, solvents or wash water into drains unless local rules and the product instructions specifically allow it.
Once the walls are dry, inspect them in both daylight and artificial light. Touch up only where necessary and use the same tool and technique used for the original application whenever possible. Reinstall plates and hardware carefully and give the coating time to cure before heavy cleaning, scrubbing or placing furniture tightly against freshly painted surfaces.
A Few Mistakes the Pros See Most Often
• Skipping cleaning and sanding because the wall 'looks fine.'
• Buying paint before testing the colour in the actual room.
• Using the cheapest brush or roller available.
• Applying paint too heavily in an attempt to avoid a second coat.
• Ignoring recommended drying and recoat times.
• Painting over damaged, glossy, greasy or stained surfaces without the correct preparation or primer.
• Rushing the last 10 percent of the job - cleanup, touch-ups and reinstalling hardware.
The Bottom Line
Painting is one of the rare home upgrades that can be affordable, achievable for a capable DIYer and genuinely transformative. The right colour can modernize a room in a weekend; careful preparation and application can make that improvement last for years.
Treat the project the way a professional painter would: plan first, prepare thoroughly, buy the right products and tools, follow the manufacturer's instructions and do not rush the finish. Fall and winter give you the perfect opportunity to work room by room and emerge in spring with a home that feels brighter, fresher and renewed.
PRO TIP: Before purchasing your full quantity of paint, test the colour in the actual room. View it beside your flooring, cabinetry and furnishings at several times of day. It is one of the simplest ways to avoid an expensive colour mistake.